Key Decisions
1) To create tension through each part of the media text.
2) To vary pace throughout the text.
3) To create a smooth, flowing media text.
Expectations
The majority of post-production work needed on my group's sequence will be with audio. Once we get the main picture edited, we will begin composing the soundtrack with the messages, sound effects and music.
Intended Outcome
To create and fluid sequence that creates tension and powerfully affects viewers psychologically, while only allowing the audience to fully understand the circumstances within the film by the end of the piece.
The Editing Suite
Expectations:
- Struggling to find enough time to get the sequence finished by the deadline.
- The ability to use professional quality, industry standard equipment.
- The help of the media department on editing techniques and changes.
Technology:
- Video sequencing software: Adobe Premier Pro
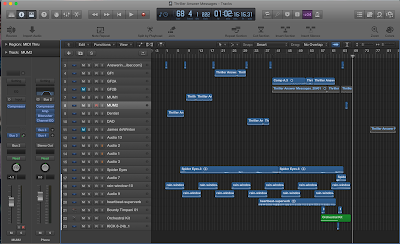
- Sound sequencing software: Logic X
- Colour correction/grading: DaVinci (possibly)
Playback and Review
- We reviewed all the rushes from the shoot day.
- This is important as it gives us an overview of the all round quality of our shooting while showing our improvement as cameramen/directors as the day progressed.
- It also allowed us to select the best "one-shot" take, and the best "bird's eye view shot" take.
- The quality of the speed and framing of each take was very important to us in deciding which were the two best takes.
- We used the timeline in the video editing software to compile the two shots and trim the in and out of each shot.
- We renamed the folders/channels/clips to make it clearer for us as editors to know which shot/channel was which.
Editing the Clips
- We trimmed either end of the two shots to great accuracy in order to acquire the best entrance and end.
- We used the razor tool to make separations in the shot where we need to change the speed.
- We cropped the bird's eye view shot so that we could then automate a zoom out later on.
- It was easy for us to arrange the shots in order as we only had two to work with.
Sound and Titles
- Once the simple sequence was arranged, we began adding titles.
- We chose a simple white font in the Premier title creator and inserted each title in a section and moment of the shot where the wasn't much to look at
- This was so that the audience's focus wasn't pulled away (by a name) from something that was important to notice.
- I began editing the soundtrack by compiling the answer messages we had recorded.
- Then I added a "telephone EQ" and a distortion effect called "Bitcrusher" to give the sound of a voicemail message, played through an answer machine.
- It was at this point that we decide that the messages would be in the form of non-diegetic sound instead of it typically being actually played from an answer machine within the house.
- I then added a phone beep sound effect in between each message.
- I had to arrange the messages in an order that gradually built in tension, from relaxed to emotional and terrified, while making sure the timing between the messages and beeps sounded exactly as if an answer machine was playing them.
- Luckily, there was no diegetic sound that we wanted to include, so we could just erase that from the project.
- I then searched on copyright-free music sites on the internet and found a piece of tense film music that I could use as the backing track, and mixed it into the audio project.
- I then added percussion sounds and programmed them in while adding reverb and echo to build more tension and create a climax point when the dead body is revealed.
Continuity
- As we only had two shots in our entire sequence, we only had to make sure that everything on set went untouched during the shooting process, and that our actor, playing dead, didn't move out of the position either.


No comments:
Post a Comment