Friday 30 October 2015

Evaluating the Preliminary Task


Page 1 of 2
During the shoot for our Preliminary Task, which took place in the Hurtwood Editing Suite, we were fortunate enough to use the Sony FS100. In most cases, especially when using a tripod, this camera really worked to my advantage, as I was assigned as the groups cameraman. Its extremely high quality and simple features and use really aided my group during the shoot. However, when we desired a handheld or floor tracking shot, the FS100 definitely dropped in practicality thanks to its weight and awkward shape. When compared to the other cameras on offer, the Canon 5D is far easier to handle off a tripod.

When it came to editing our comical sequence, we were definitely pushed for time, and felt like the process was slightly rushed. This resulted in a relatively quick and rough edit of the project, but thankfully we were able to complete the entire edit, including the added sound effect at the end of the sequence. 
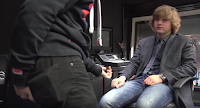
We wanted to follow the original storyboard pretty closely, but then pride ourselves on the flow and natural feel of the scene. This was a challenging task to accomplish, but I believe in the time we were given, we did a decent job. The hardest part of the editing process was figuring out how to structure the final few shots and dialogue. This was critical to the comedic effect of not just the punch line, but the entire scene. In my opinion, the last few shots weren't too obvious or over the top, and paired well with the subtle, yet hilarious punch line.


In conclusion, the task went very well, as our creation was of a high quality in terms of shot variation and creativity, alongside the smooth flow of the edit. However, if there was one thing I could change, it was the quality of the dialogue/audio. As we only had access to a camera microphone (which did the job - as you can understand the dialogue), any movement of the camera had an effect on volume as well as adding noise that minimised the overall clarity. Therefore, I would have liked to use an aerial boom mic throughout the sequence.

Studio Lesson 4: Shooting the Preliminary Task


Today we shot our sequence for the preliminary media studies task. We were briefed on a simple story bored, given to us by our teacher, containing script, positioning, and shot type, that we were all to follow as closely or as loosely as we liked. My group of 4 decided that the storyline was very dull, and so added a comical twist that underlined the entire piece that made its fantastic "outburst" in the ending.

We realised that although we had multiple different shots for multiple different parts of the sequence, the wisest route was to shoot the whole sequence to perfection in each shot. This way we could use any part of the sequence with any shot. We also realised that, thanks to our great choice in location, it would be difficult to break the 180-degree rule, as the characters were up against a long desk. Continuity was very important to us with such a simple, yet critical sequence.

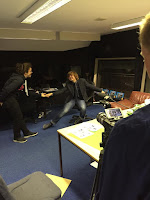
We began with the simplest shot which was the wide shot. We chose the entrance for one character, and a starting position for the other that suited the shooting area, as you can see in the opposite photo. We ran the sequence multiple times so that the actors could practice their lines, while Chris (assigned director) and I (assigned cameraman) began setting up the camera. Once we had white-balanced, corrected the exposure levels, and focused the shot, we began to shoot the whole sequence multiple times. Each time we went through it, we started a new clip, and eventually, after maybe four takes, we got the perfect run through with the perfect wide shot.


As we went through each shot that we had been asked to use (on the story board), we repeated the same process until we got the perfect take for that shot. As well as the wide shote, we used a mid shot, two over-the-shoulder shots and three close ups. Once these were all complete, we decided to add our own little details that would create a more professional look to the overall sequence.

For example, we decided that we wanted a horizontal tracking shot of the character's feet as he walks into the room. As we didn't have access to any equipment that would aid us in creating that shot, we were forced to get creative. We fortunately came up with the idea of sliding a smooth slab of wood, with the camera on top of it, along the carpet. This meant we could control the speed of the track, as well as the angle and rotation as the tracking takes place. After multiple unsuccessful takes, we finally got that perfect shot, which was surprisingly smooth.
As well as this shot, we added a close-up of the character's finger being pulled, and short close-ups of extra clips which included things like typing on a keyboard and pushing buttons.
In conclusion, I believe the shoot was very successful, in that we covered all the bases of the storyboard in a professional way, and added our own touch with an edit to the script and detailed extra shots.

Monday 19 October 2015

Brainstorming Ideas for Thriller Opening Sequence


Idea 1
I was inspired by a recent thriller called 'Anna' that is based on a mentally disturbed/possessed young teenage daughter who meets a specialist psychologist who tries to help save her from her step father.
My opening sequence would be set inside an old antique filled house when the psychologist knocks on the front door and meets the girls female carer. He is invited into the house, offered a drink, and begins a conversation with the carer consisting of a brief about the teenage girl. During this discussion, flashbacks are seen of short clips of past traumatic events of the girl's childhood. She tells him about her disturbed, yet secretive, past, along with the current details of her life, including the hunger strike and how she remains in the same place, in her seat throughout the entirety of each day. Once he begins to understand the situation, the carer leads him upstairs to the cctv room. The girls bedroom is surrounded by cameras, inside and out, in order to protect her. She proves that the girl stays in her seat all day by showing him some footage and the current live feed.
He then says that he would like to meet her. The carer looks worried but accepts his plea. He is then showed the way down a dark, creeky corridor. As he slowly walks towards her door, tension builds in music, and we are notified of the sweat on the doctor's brow. Finally, he arrives at the door, and reaches for the handle. He is surprised that the door has been left unlocked, but as he enters the room, his expression turns to shock, as she is nowhere to be seen. He looks and looks from same position in door way. Suddenly, the little girl tugs at his trouser, and asks, "are you God... or the devil?" in a faint creepy voice. The camera slowly turns to the girls face (closeup) which is frightened, but satanic. Cut to black. Faint scream is heard in the background.

Idea 2
My second idea runs along the lines of a mini bus full of children driving down a narrow meandering road in the hills of the country side. Shots of them excitedly driving to a school trip as well as shots of the info flyer on their trip, the radio, their faces, them singing, the bus driver concentrating. 
Then we see a shot of a Lamborghini driving towards them. its going very fast. As the auto-vehicles drive closer and closer into each other, tension in the soundtrack builds. They crash, in slow motion, as we see the bus glide through the air, smashed glass filling the air, along with blood. 


Then the cars both land upside down. The petrol starts to drip from the supercar. As the bus driver is helping the kids out of the bus he notices the petrol. First, he rapidly removes all the children from the terrible situation, then he runs to the lamb and begins work on helping the other driver out of his speeder. The tension begins to build once more with the beat of the music matching to the drips of petrol from the car. Gradually a pool starts to build up, then we see a shot of wires sparking nearby in the car. Cut. End here.

Idea 3
This idea is the most artistic and aesthetically superior. Set in the woods next to my boarding house, in an abandoned shed. No dialogue will be used. Intro is just stunning establishing shots of a man carrying a dead teenage boy's body through the woods. He reaches the shed and drops body in front of main door. (shot: close up of feet walking to spot, then body drops, and bloody face lands in frame). Then there's a quick time-lapse shot change to the night time and the man slowly walks into focus carrying lighter fluid/wood/etc. He then covers body in lighter fluid and wood etc and lights the body up in flames. Sequence continues with stunning slow-mo shots of flames in pitch-black darkness using all the different light/colours/shadows etc. Tension builds with classical music/strings. Fade to black. End. 

Thursday 15 October 2015

Studio Lesson 3: Editing


In our most recent lesson in the TV Studio, we were introduced to the Editing Suite. We learnt how to use the main editing software used for sequences at Hurtwood, called Adobe Premiere. 

File Transport
Once we opened a new project in Premiere, you have to import all the relevant clips from the shoot and sort them into folders called "bins". These raw video files are traditionally called the "Rushes" (from the times when the reels had to be ran to the processing room so they could be viewed by the directing staff in order to see what went well/bad and what more was needed after the days shooting) and you can see them in the bottom left of the screenshot below.


Cutting/Pasting Clips
When viewing each clip in the library (in the top left window of the screenshot above), you play through until you find the "last frame in" and the "first frame out". Once you have found the frame of entrance with the yellow scroller, you press "i" on the keyboard to trim the start to that position. Then scroll through to the last frame of exit and press "o" to trim the clip end to that point. Then you click and drag that trimmed clip in to the arrangement area of the software (the bottom right). You place your first clip into video track 1 and audio track 1. Repeat this process with your next clip and drag and drop it into AV tracks 2. When you press play, the software automatically plays the clip that's on the highest track. So when track 2 overlaps track 1, it changes from 1 to 2, as you can see in the screenshot below. The clips are overlapped above and above.
Repeat this step with every shot you want to include while keeping an eye out for the audio, trimming it (or letting it play on entirely) with each trim of a clip.
Gradually, we started to build up our sequence using all the different shots we had from the week before. This included several wide shots, a mid shot, and several close ups, as well as a horizontal tracking shot for the footsteps. We were also notified of how important it was to constantly save our work in order to back up the progress we had made in case the computer crashed or there was a power cut. We had named ours with a unique and relevant name including our initials and project name. Finally, after making some final touches to the flow of the sequence, we checked for continuity, watched it in full a final time, and saved our finished sequence. 
Easy.

Use Of Sound in Thriller Sequences


"Whitechapel" - opening sequence

Pleonastic: The various pleonastic sounds used in White chapel's opening scene consist of smashing glass, blade swings, doors slamming, rain splashing, blood choking, screams, sirens and footsteps. These are all typical of thriller sound and all the sounds provoke feelings of tension, drama and violence, instantly giving the audience an intense look into what the upcoming tv programme is about.

Non-Diegetic: The sound track to this dramatic opening sequence consists of orchestral instruments playing classical music that one would relate to a horror movie. With high-pitched screechy violin lines representing screams and light echoed drums, the piece creates a very eery and tension provoking mood.


"The Dark Night" - opening sequence

Pleonastic: In the dramatic opening scene of this Action-Thriller movie, various sounds related to violence are heard. Pistols, automatic machine guns and shotguns are all fire off within this scene. These have been recorded and edited in during post production. There are lots of examples of smashing glass during the scene, as well as people screaming and shouting. The best example of a pleonastic sound during this scene is when the henchman pull the pins on the grenades. In reality, this subtle sound would not be heard, but during the film it is boosted to emphasise the occurrence of the event.

Non-Diegetic: The sound track to this iconic opening scene is very modern and consists of typical string and guitar stabby waves that repeat in quick sequence to create tension. Big echoed drums are added as well as distorted guitar strumming. All this orchestration builds and falls, allowing the tension to build and then relax again, taking the audience on a sonic rollercoaster ride while the action and thrills play out in front of their eyes.

Tuesday 6 October 2015

Genre


A genre is a way of categorising certain types of film characterised by similarities in form, style or subject matter.
Genre can be an important factor in influencing audiences when selecting films to watch.
If an audience can identify the genre of a film they will establish certain expectations about whether or not they will enjoy the film.

Hybrid Genre / Sub genre
A hybrid genre is a genre that blends themes and elements from two or more different genres. A sub genre is a subcategory within a particular genre. E.g: The academic mystery is a sub genre of the mystery novel.

“My Bloody Valentine”
Horror: Lots of death, screaming, stupid women, blood, weapons, jumps, tension, title, background music, caves/tunnels.

“Scary Mary Poppins”
Thriller: Tense scary music, titles, lots of screaming faces, scared children, screaming

Identifying Genre
Western: costume, surroundings/mise-en-scene, setting-desert/cemetery, guns/cowboy hat
Action: blurred picture, fast pace, scream facial expression, angry, holding gun
War: costume-uniform, guns, beach setting, barriers on beach, Normandy landings
Sci-Fi: blue light, cyborg costume, mist, technology, aliens

Repertoire of Elements
Settings/Locations/Time - Stars/Specific/Types - Story lines - 
Music - Themes - Iconography/Props/Costumes - Characters

Iconography
An important aspect of genre. We expect to see certain objects on screen when we see a particular genre. 
E.g: Western - dusty lonely roads, saloon bars, cowboy hats, horses, etc.

Genre            Conventions                                Film Titles
Action                 Guns, weapons, stunts, explosions             Die hard, Expendables

Comedy              Jokes, lines, certain actors, sitcom              We’re The Millers

Horror                Gore, blood, screams, stupid girls               Scream, Carrie

Romance            Sex, flirting, relationships, love                   Love Actually, The Notebook

Camera Shots, Angles & Movements (SAM)


Establishing Shot (ES)
At start of film, at start of new location or scene, scenery/setting as subject.

Extreme Long Shot (ELS)
To show the subject on a mass scale, can convey an emotion/circumstance.

Long Shot (LS)
Shows subject as entire focus, with setting in background, shows knees upward if subject is a person.

Mid Long Shot (MIS)
Similar to LS, shows mid-body upwards.

Mid Shot (MS)
Gives more detail, chest up

Close Up (CU)
Extra detail, complete focus, facial expressions, important features

Extreme Close Up (ECU)
Extreme detail

High Angle Shot (HAS)
Hovering over, looking down on subject, conveying watcher’s power over subject

Low Angle (LA)
Subject above, audience feels vulnerable/inferior

High Vs Low

Point of View (POV)

Over the Shoulder Shot
Conveys eavesdropping

Canted Angle (Dutch Angle)
Rotated shot, conveys confusion/dizziness


Camera Movements
Pan - moving the camera lens to one side or another
Zoom - changing the focal length of the lens to make the subject appear closer or further away in the frame
Tilt - moving lens up or down, keeping camera in same place
Track - camera moves either left to right or forward and back while keeping the subject in the centre of the shot (circling the subject)
Hand Held - when action is too fast so camera has to be moved fast (creates blurry, faster, energy shot)